SSH keys provide a more secure and convenient way to authenticate than passwords. Below is a structured guide for generating and using SSH keys on Linux, macOS, and Windows.
Generating SSH Keys
Linux & macOS
SSH key pair generation on Linux and macOS systems follows a straightforward process, as outlined in the following steps.
- Open a terminal.
- Generate a new key pair
#ssh-keygen -t rsa- Follow prompts to:
- Choose a save location (default: ~/.ssh/id_rsa).
- Set a passphrase (recommended for extra security).
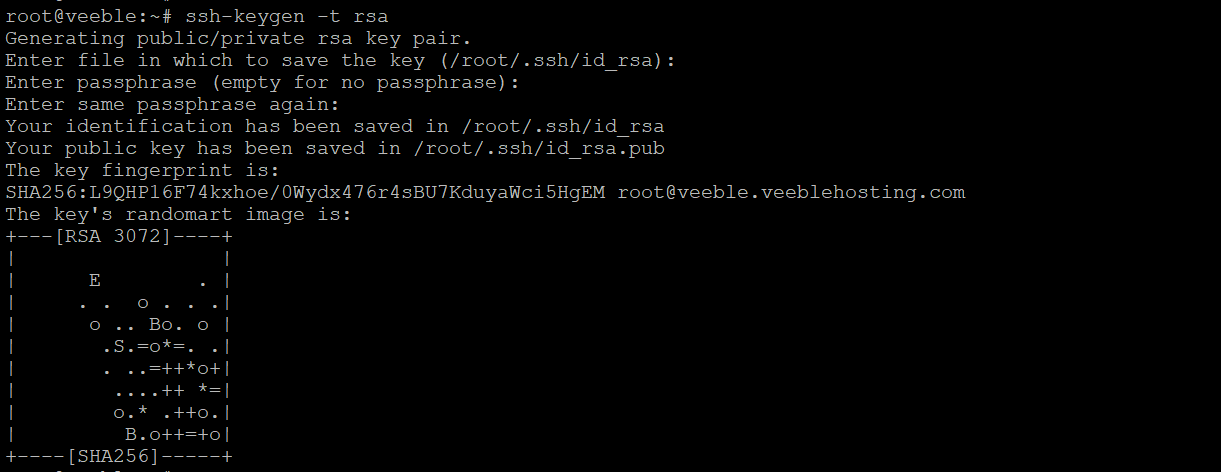
3. Verify the keys:
#ls ~/.ssh/You should see:
id_rsa (private key, keep secure!)
id_rsa.pub (public key, to be shared).
4. Copy the id_rsa.pub contents and paste them in the box when prompted during the order process.

This key pair enables secure authentication to your Veeble cloud server. Please ensure the private key remains securely stored on your local PC, as it serves as your access credential.
PuTTY (Windows)
If you’re using PuTTY on a Windows laptop or PC, follow these steps to create an SSH key pair:
- Open PuTTYgen (the included key generation tool).
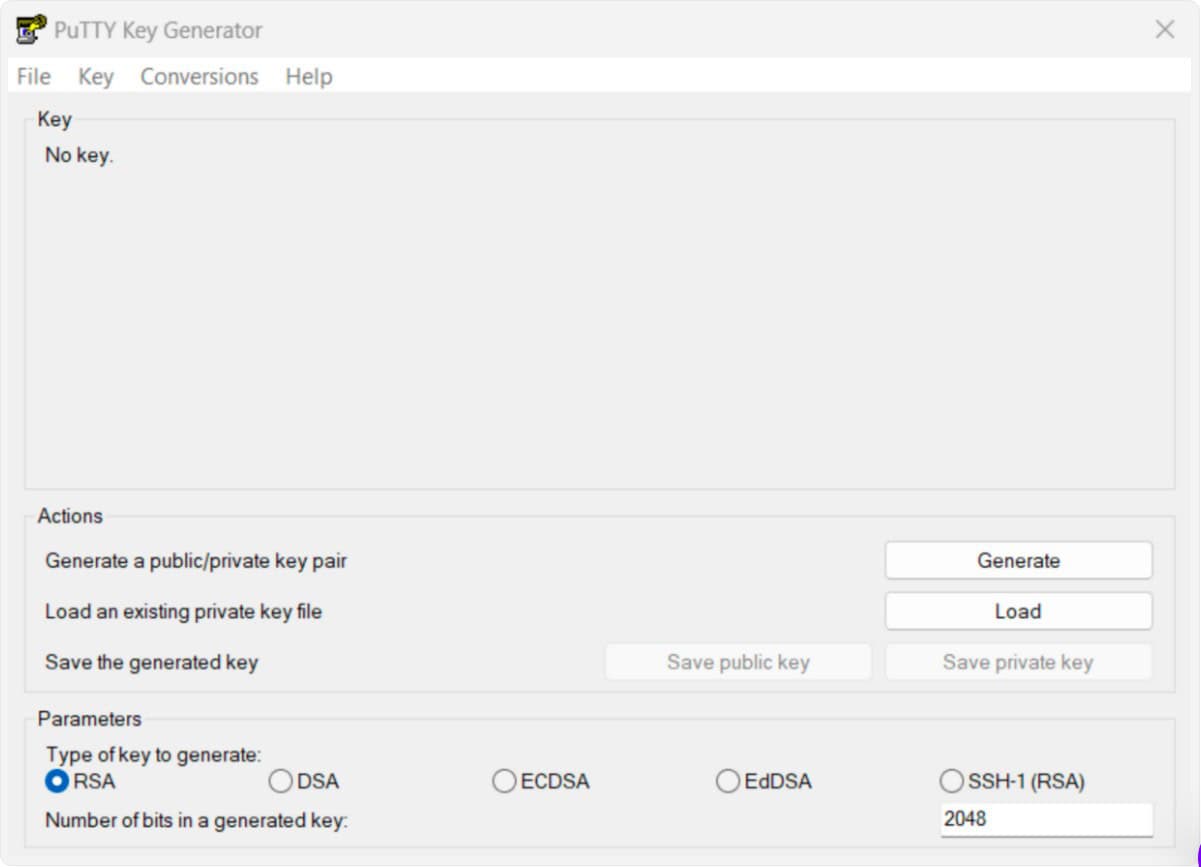
- In the PuTTYgen window, confirm that RSA is selected as the key type (this generates an SSH-2 RSA key). Avoid SSH-1, as it’s outdated.
- To add randomness, move your mouse cursor around the blank area until the progress bar finishes.
- Click the Generate button to create a new key.
Upon completion, PuTTYgen will generate a private key and a public key.
Setting a Key Passphrase (Optional but Recommended)
For enhanced security, you may enter a passphrase in the designated fields. This passphrase encrypts the private key, preventing unauthorized access even if the key is compromised.
Saving the Private Key
- Click “Save private key” to securely store the private key on your local machine.
- Important: Keep this file in a secure location, as it cannot be recovered if lost.
Copy the entire public key text to your clipboard. Unlike the private key, the public key does not require secure storage—it can always be regenerated from the private key if needed.
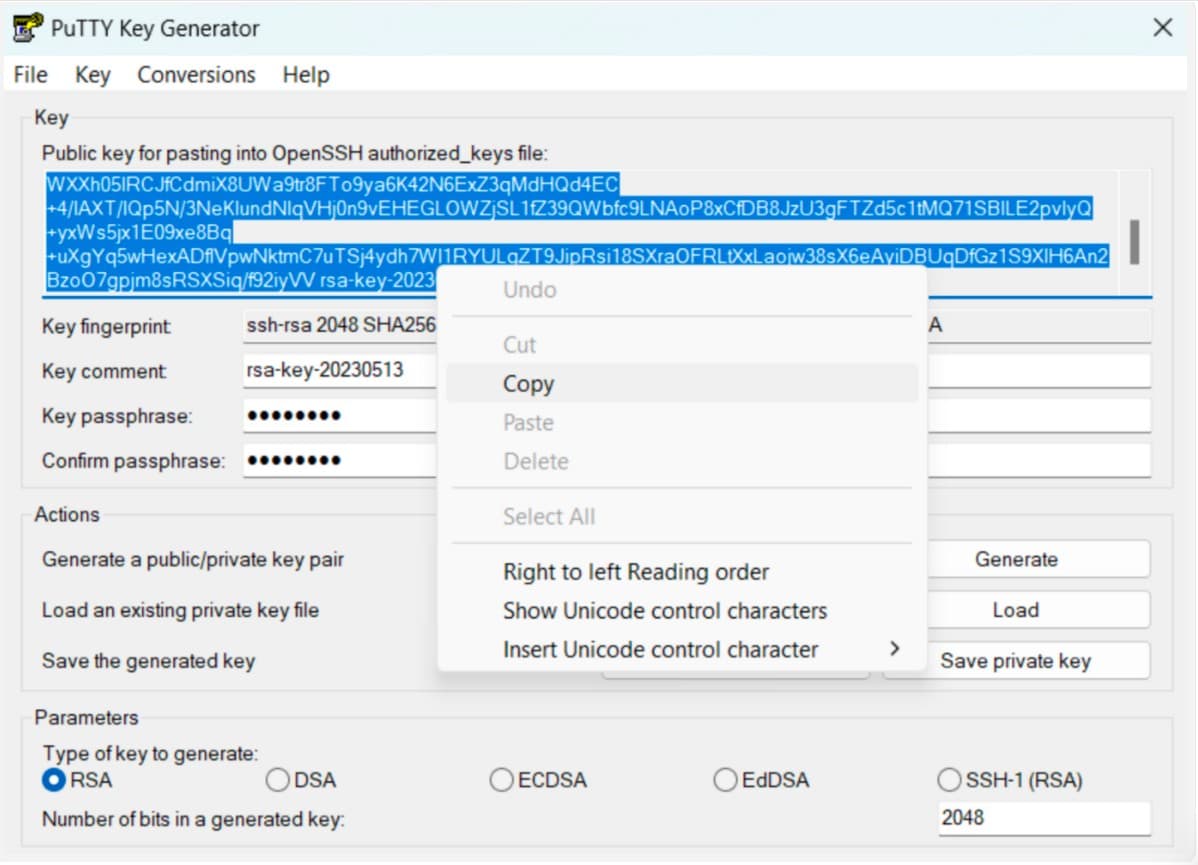
Next, paste this public key into the required field when ordering your Cloud VPS, completing the authentication setup.
You can go ahead and order the cloud server now